Infoblox
Deploy Infoblox DDI VM on VmWare
Lab setup
· We
have two node deployment.
o
Hostname: ns1.lab-net.in IP Addresss:192.168.0.31
o
Hostname: ns2.lab-net.in IP Addresss:192.168.0.32
· Create
two VIM using NIOS ova (nios-8.5.2) on ESXi-8
Step 1: Create Infoblox vm Using OVA.
Login into esxi host >
Virtual Machines > New virtual machine.


Wait till VM is created
successfully.
Step 2: Access VM console
(Setup ip)
First time Infoblox VM
console login:
Username: admin
Password: infoblox

Set ip for node using command > set networks


Step 2: Setup 90 day
evaluation license.
· Once node restart, re-login and set license. Using command > set temp_licenese
o Do it two time one for service license and 2nd time nios license.
Infoblox> set temp_license


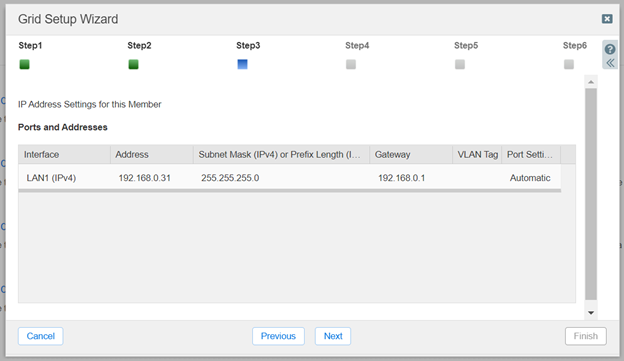
STEP 3: Login to GUI of
node 1 (ns1 / 192.168.0.31)
Run Grid setup wizard


· Login into 1st node ns1 and run through Grid setup wizard.


Note: Don’t change date and time only set time zone. Changing time cause temporary license to expire.
Keep it default.


Relogin with new password.


Step 2: Setup 2nd node (ns2 / 192.169.0.32)
Setup similar to nod1, but once it online don’t run grid setup wizard, just keep grid and node name default.
Setup summary:
- Set ip
- Set license
- Verify Gui access (node is is default grid : Infoblox, and hostname is infoblox@local.doman
·
· 
·


Login into GUI


Just note that 2nd node has default grid name and hostname.
Now go to Primary Node and add 2nd node to grid


Now access 2nd node console


Verify status on master node ns1


Note: now onwards even if you try to access url 2 node ns2, it will redirect to primary node ns1.
Enable dhcp dns service


Same for DNS service

Configure DNS setting


Adding dns entries


